
How to configure date syncing
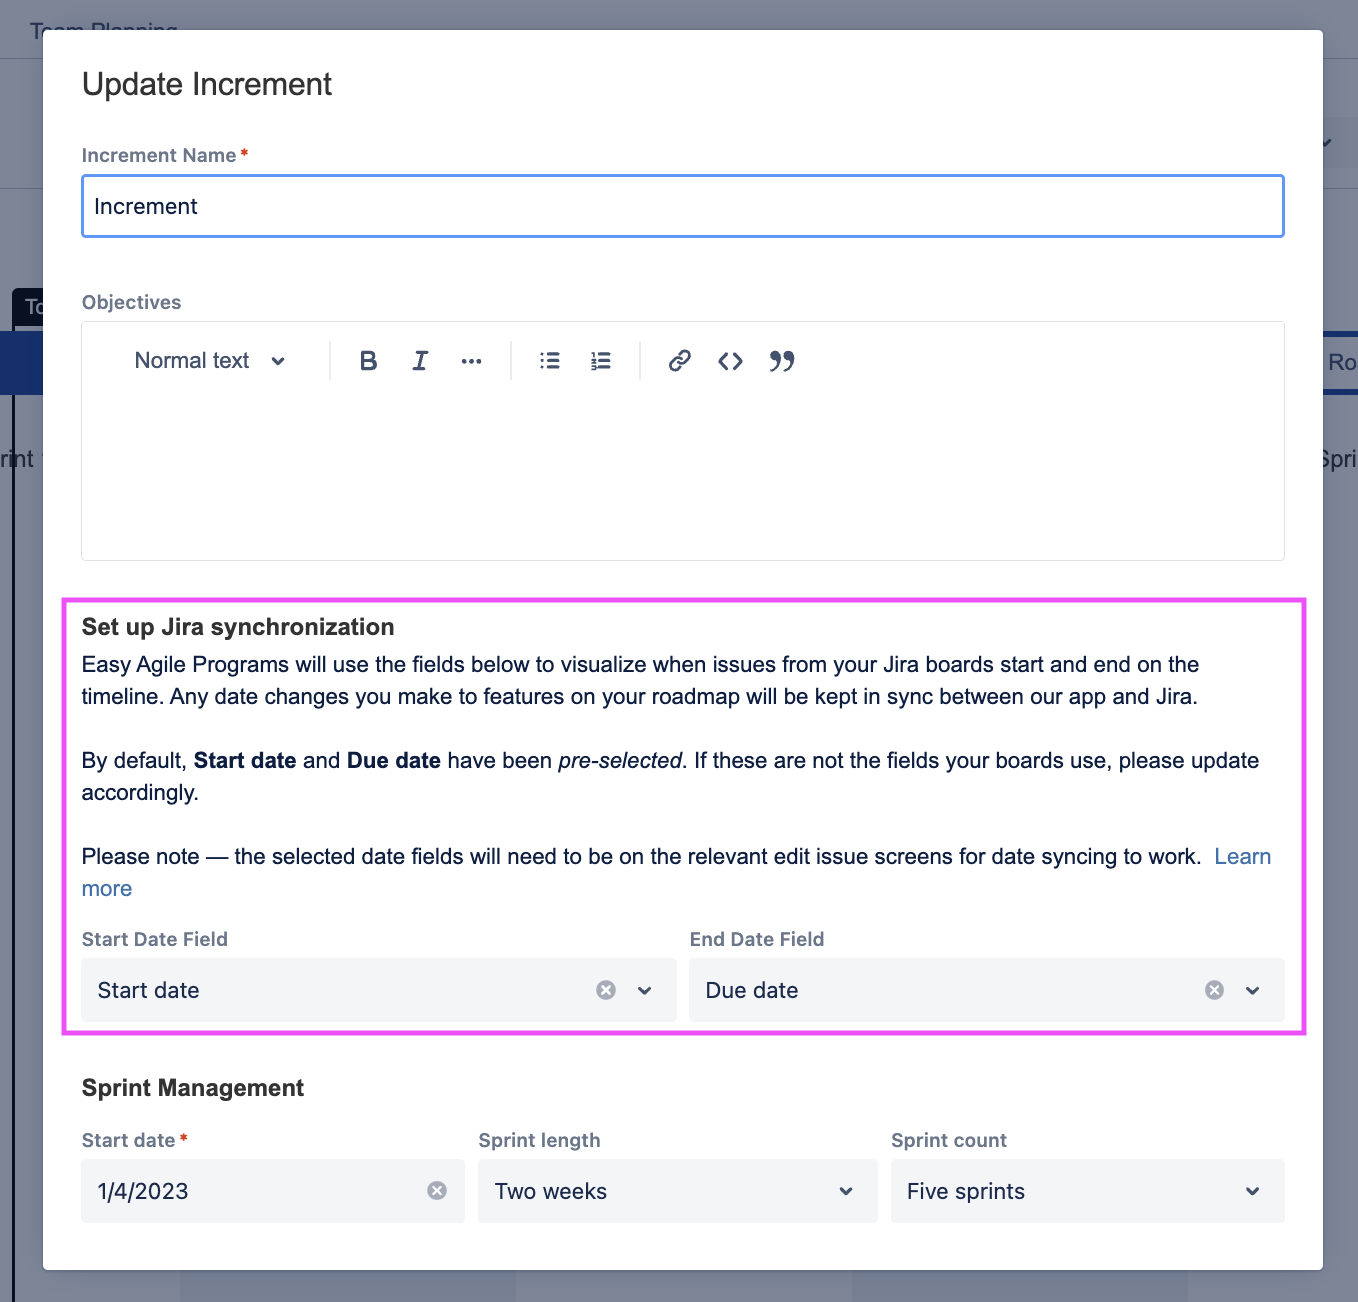
On the Create/Edit Increment screen:
-
Select the Start Date and End Date field used
-
By default, Start date/Due date will be selected on Cloud and Target start/Target end will be shown on Server/Data Center.
-
-
Click on the Create/Update Increment button to save your changes.
Confirm with your Jira Administrator that these date fields on the Jira edit issue screen.
Note: Editing an increment requires Manage Programs or Jira Administrator permissions.
FAQs
Can I continue without using date syncing?
Yes. Simply leave these fields blank when creating a new increment. Without date syncing, any scheduling changes made to your feature roadmap will not be reflected to the rest of Jira. Additionally, any scheduling changes to the feature made outside of Programs will not be automatically reflected on the Program Roadmap.
Please note: team level issues like user stories will be in sync with Jira for scrum boards without date syncing as we use the sprint to keep these issues updated.
Will turning on date syncing impact previous increments?
No. Dates are added on the increment so that the plans for previous increments are not impacted.
Once date fields are selected on an increment, Programs will remember these dates and pre-populate your selection for the following increments.
If you would like to enable date syncing for a current or past increment, add the date fields on the edit increment modal.